With a few professional tips and tricks, such as chilling the meat and using a sharp knife, you can slice meat to yield a jerky with consistent thickness and the perfect chew.
Consistent thickness is the name of the game when it comes to jerky slicing. Slicing your jerky evenly will ensure that each piece cooks and dries at the same rate. This prevents over-drying and under-drying.
We recommend slicing meat for jerky at a thickness between 1/8″ and 1/4″ with the perfect thickness at 3/16”.
How do you like your jerky? Tough and chewy or soft and fall-part? Cutting with the grain yields a jerky with a tougher, more traditional chew. Cutting against the grain creates a jerky that is softer, and easier to chew.
Keep reading to learn more about slicing and the grain in meat, plus other insider tips that will help you slice your jerky like the professionals. We’ve been making commercial beef jerky for over 90+ years and four generations. These insights and lessons have been passed down from generation-to-generation and we’re excited to share them with you.
Still looking for the best cut of meat for beef jerky? Click to read our comprehensive guide to the Best Cuts of Meat for Beef Jerky.
Let’s dive into the 5 simple but effective steps to slice meat for jerky.
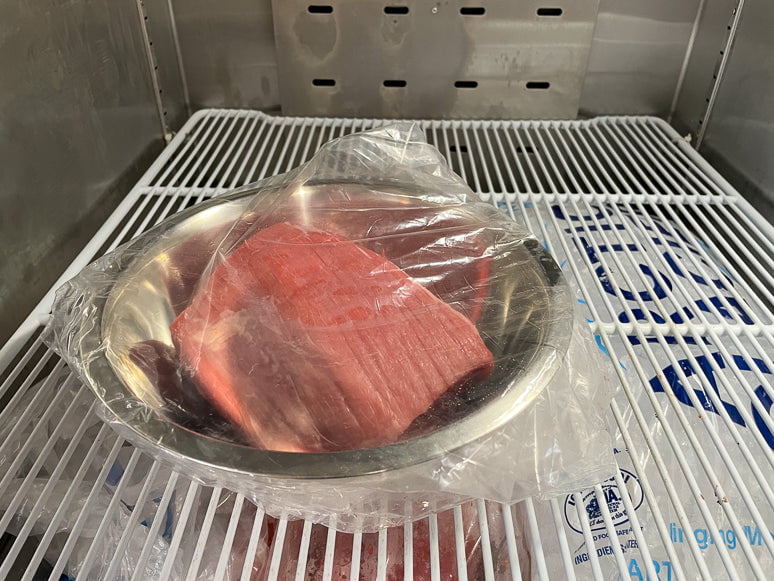
Step #1 – Chill Your Meat in the Freezer
Before you even pick up a knife, the first step is to chill the meat to make it easier to handle.
Cover with plastic wrap and place your meat in the freezer until it’s firm, but not frozen.
Anything less than almost-frozen or very cold meat can be difficult to slice. Room temperature meat is wobbly, wiggly, and unwieldy. A firm, cold piece of meat is easier to slice, especially when you’re aiming for thin, even slices.
You shouldn’t actually freeze the meat. The meat should stay in the freezer until just chilled and firmed. The time will depend on the temperature of the meat and freezer. Check the meat after 30 minutes. It’s not unusual to leave it in the freezer for upwards of an hour depending on your starting temperature.
Take advantage of the chilling time to prep all your ingredients and equipment.
Step #2 – Trim External Fat
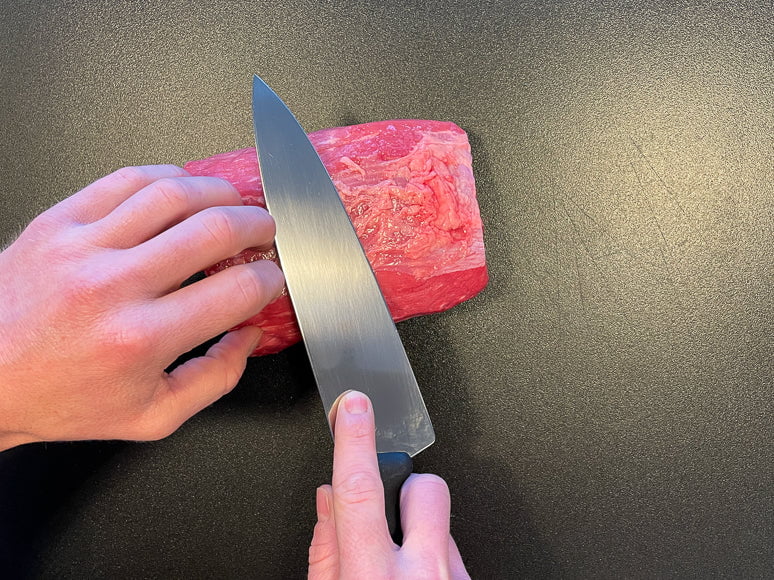
Once the meat has been chilled and firm to the touch, it’s time to trim the external fat.
One of the beautiful parts of working with natural ingredients when making jerky is the lack of uniformity. Every cut of meat is going to be different and that’s what makes it challenging and fun.
The amount of external fat will depend on the type of cut of meat. Some protein sources and cuts have more external fat than others.
For example, a venison loin is extremely lean as compared to a beef brisket flat that has a thick fat cap. Regardless of the fat content, always make sure to remove as much external fat as possible.
The goal is to clean as much fat as possible without cutting into the lean meat. Don’t worry if there’s some fat remaining as most of it will render out during the cooking process. Plus, you can always trim the fat after the cooking and drying stage.
Read the full article here.